Basics of R & RStudio
RStudio IDE
RStudio IDE
RStudio IDE
RStudio IDE
RStudio IDE
RStudio IDE
RStudio IDE
Let's take a look at the IDE in RStudio Cloud...
Basic computing
# Addition2 + 3## [1] 5# Subtraction2 - 3## [1] -1# Multiplication2 * 3## [1] 6# Division10/2## [1] 5Basic computing
# Exponents4^2## [1] 16# Roots4^(1/2)## [1] 2Basic computing
# Exponents4^2## [1] 16# Roots4^(1/2)## [1] 2Thankfully, R follows the order of operations (PEMDAS).
2^3 + 4 * 1/2## [1] 10Basic computing
# Exponents4^2## [1] 16# Roots4^(1/2)## [1] 2Thankfully, R follows the order of operations (PEMDAS).
2^3 + 4 * 1/2## [1] 10These values haven't been stored anywhere though...
Storing values in objects
To keep a value in memory, we need to assign it to an object.
Storing values in objects
To keep a value in memory, we need to assign it to an object.
To assign a value to an object, use the assignment operator. It looks like a left-pointing arrow:
<-
Storing values in objects
To keep a value in memory, we need to assign it to an object.
To assign a value to an object, use the assignment operator. It looks like a left-pointing arrow:
<-
Let's use <- to create an object called x, that is assigned the number 8.
x <- 8Storing values in objects
To keep a value in memory, we need to assign it to an object.
To assign a value to an object, use the assignment operator. It looks like a left-pointing arrow:
<-
Let's use <- to create an object called x, that is assigned the number 8.
x <- 8Now we can call x by name, and it will print the value.
x## [1] 8Style
Technically, both <- and = work as assignment operators. But we'll strictly use <- from here on out.
Style
Technically, both <- and = work as assignment operators. But we'll strictly use <- from here on out.
This brings up a general coding principle of the day...
Style
Technically, both <- and = work as assignment operators. But we'll strictly use <- from here on out.
This brings up a general coding principle of the day...
Style is important!
You want to use a consistent style so that others (including your future self) can easily and quickly read your code.
I highly recommend following the tidyverse style guide. We'll talk more about the tidyverse tomorrow
Hint: You will type <- a LOT. The keyboard shortcut Alt+- or Option+- can be used to insert a <-.
Storing values in objects
Now, let's take a look at the variable y...
Storing values in objects
Now, let's take a look at the variable y...
# call yy## Error in eval(expr, envir, enclos): object 'y' not foundStoring values in objects
Now, let's take a look at the variable y...
# call yy## Error in eval(expr, envir, enclos): object 'y' not foundWhoops! We didn't assign anything to y. Calling a variable that doesn't exist leads to an error message.
Storing values in objects
Now, let's take a look at the variable y...
# call yy## Error in eval(expr, envir, enclos): object 'y' not foundWhoops! We didn't assign anything to y. Calling a variable that doesn't exist leads to an error message.
You'll see a LOT of error messages when using R. Don't worry when this happens. This is 100% normal, and it happens to everyone all the time.
# Need to assign something to y!y <- 2y## [1] 2Storing values in objects
Now, we can use these variables in calculations
Storing values in objects
Now, we can use these variables in calculations
Remember, x <- 8 and y <- 2
# multiply themx * y## [1] 16Storing values in objects
Now, we can use these variables in calculations
Remember, x <- 8 and y <- 2
# multiply themx * y## [1] 16But remember, if we want to save the output of that calculation, we need to assign it to an object!
# define the product as zz <- x * y# print zz## [1] 16Naming variables
You may be wondering how to name variables in R. There are just a few rules...
Naming variables
You may be wondering how to name variables in R. There are just a few rules...
object names must start with a letter
can contain alphanumeric characters, "_", and "."
R is case sensitive, so
Aandawould be different variables
Naming variables
You may be wondering how to name variables in R. There are just a few rules...
object names must start with a letter
can contain alphanumeric characters, "_", and "."
R is case sensitive, so
Aandawould be different variables
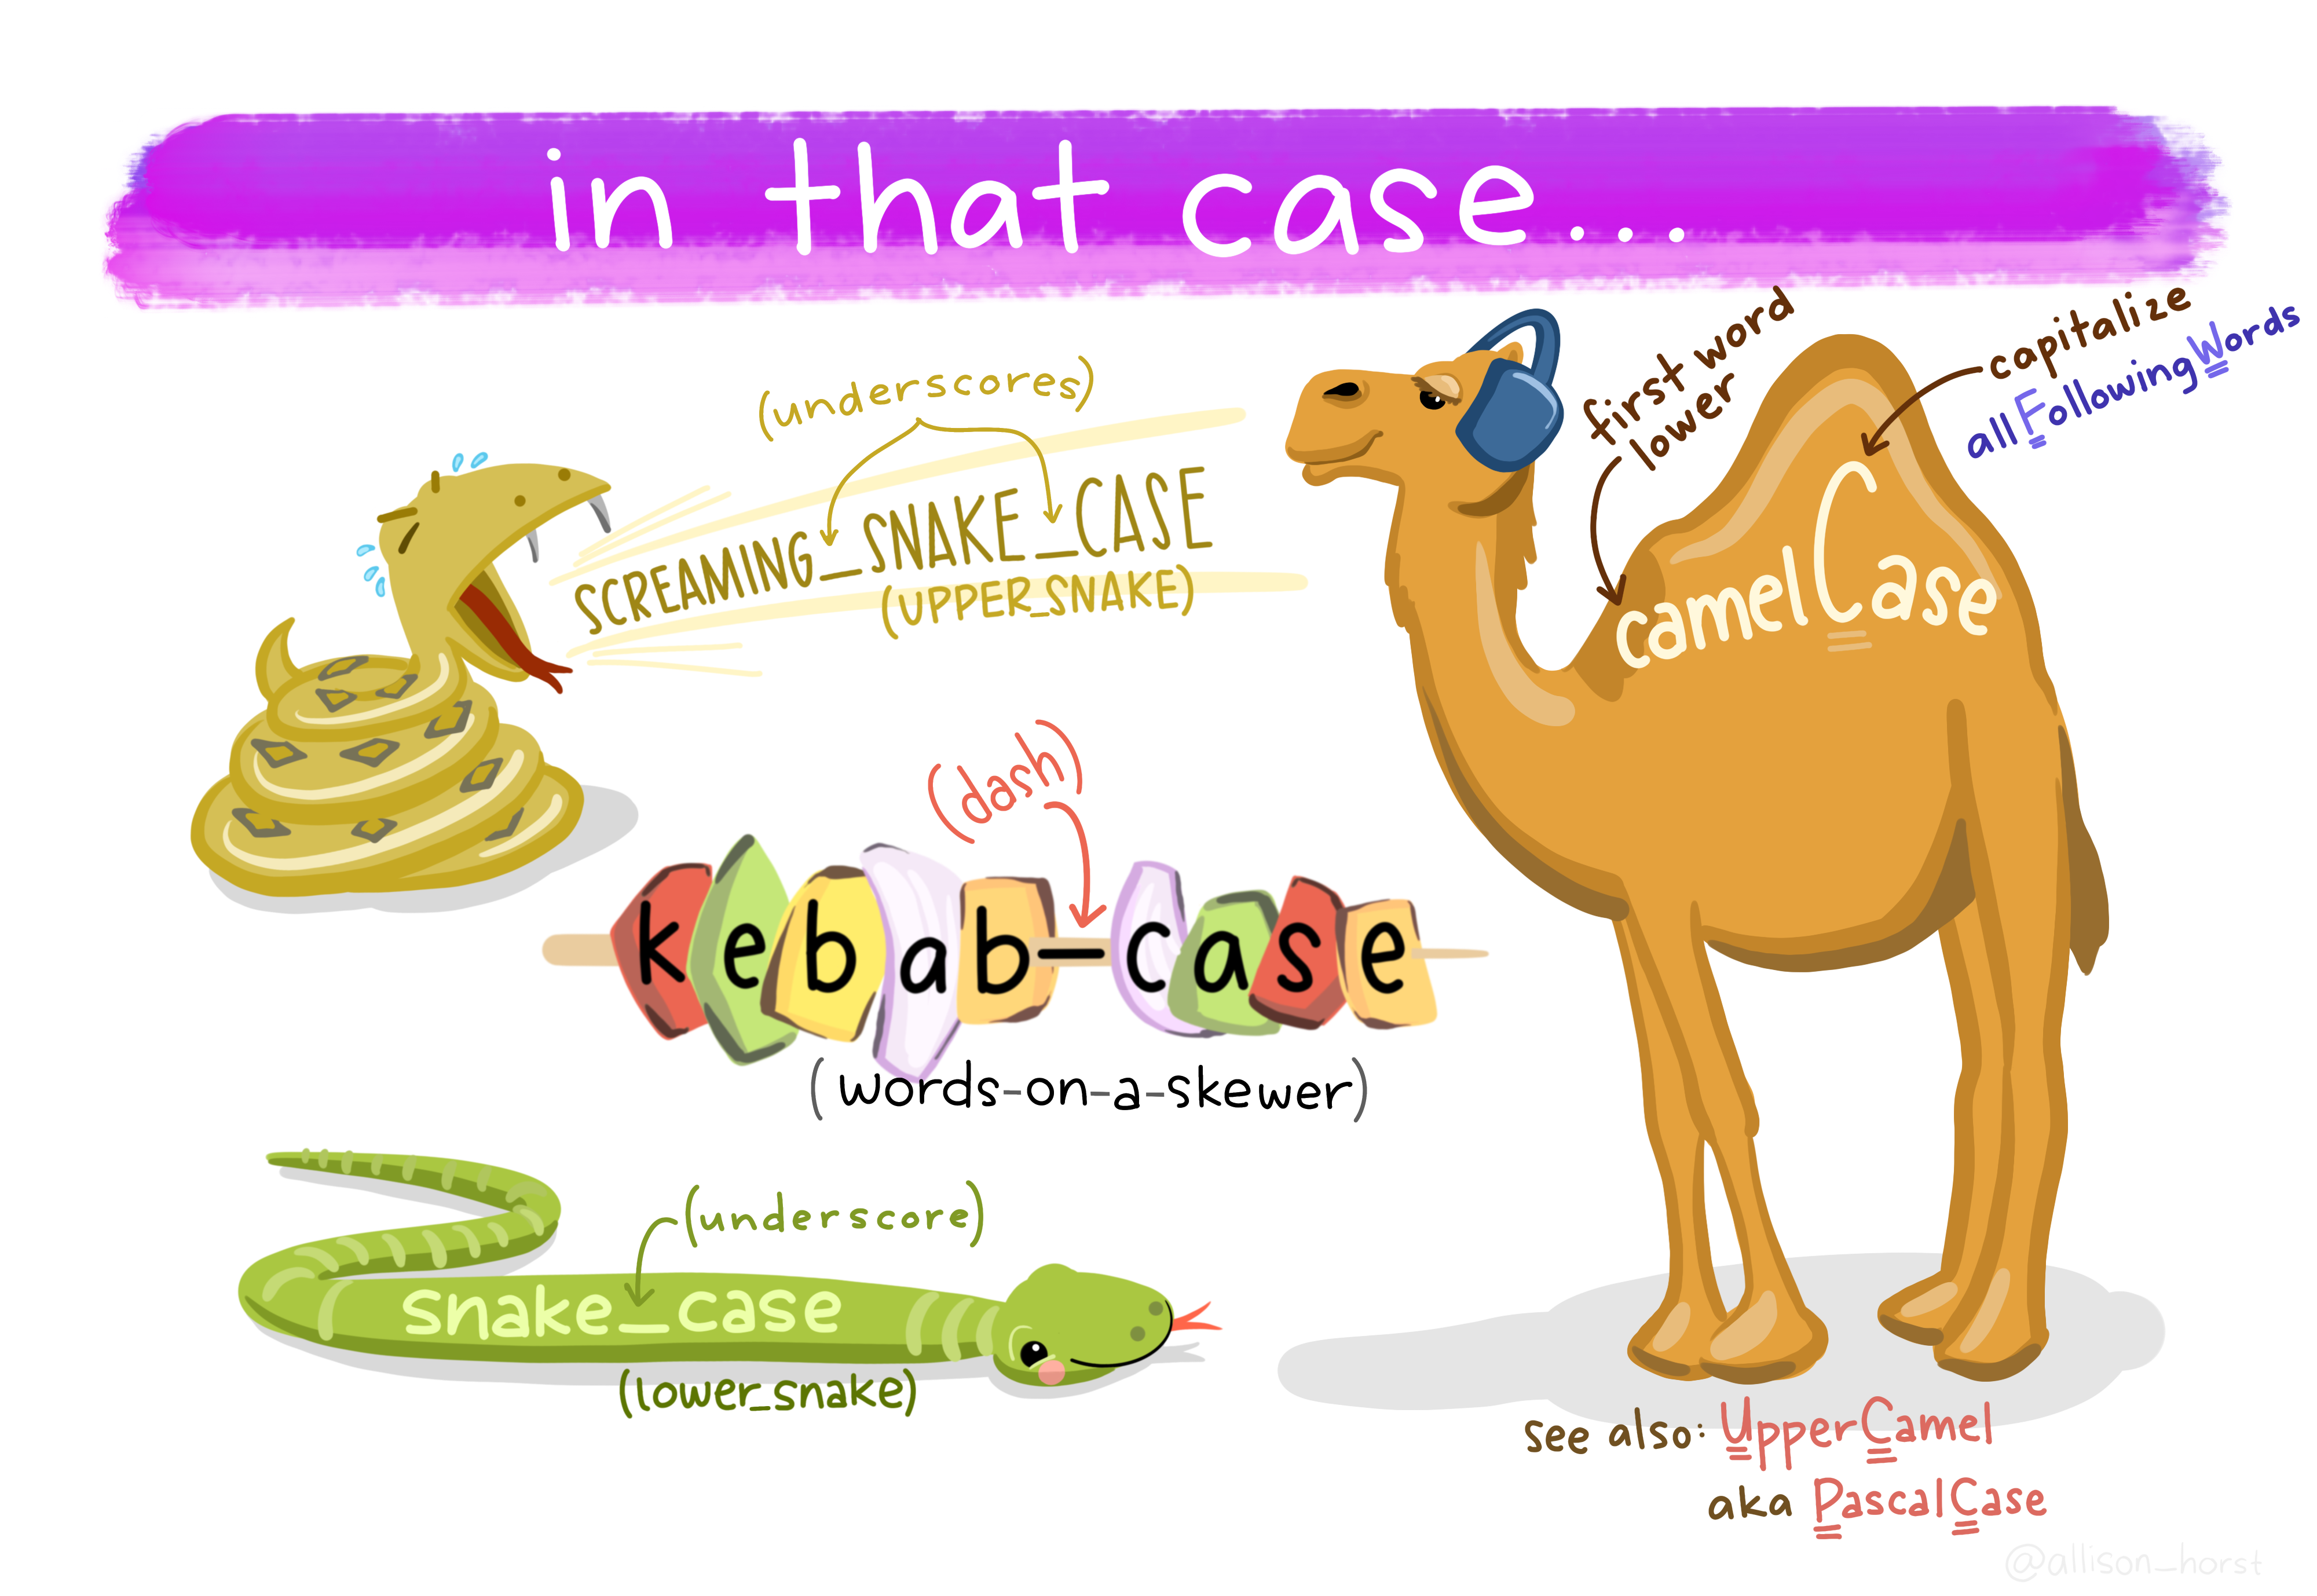
This is another element of style. Using a consistent style when naming variables makes your life easier. There are several to choose from.
Naming variables
Artwork by @allison_horst
Some examples
- this_is_snake_case
- thisIsCamelCase
- avoid.using.periods
I'll be using snake_case from here on, but you can change to another option if you'd like.
Your turn 1
01:30
Open the file your_turn.Rmd inside the project 01_rstudio_basics on RStudio Cloud.
Create a variable called
var_1that is equal to 4.Then create a variable called
var_2that isvar_1raised to the power of 6. Print the results (i.e. check what value is assigned tovar_2).
R Markdown
Artwork by @allison_horst
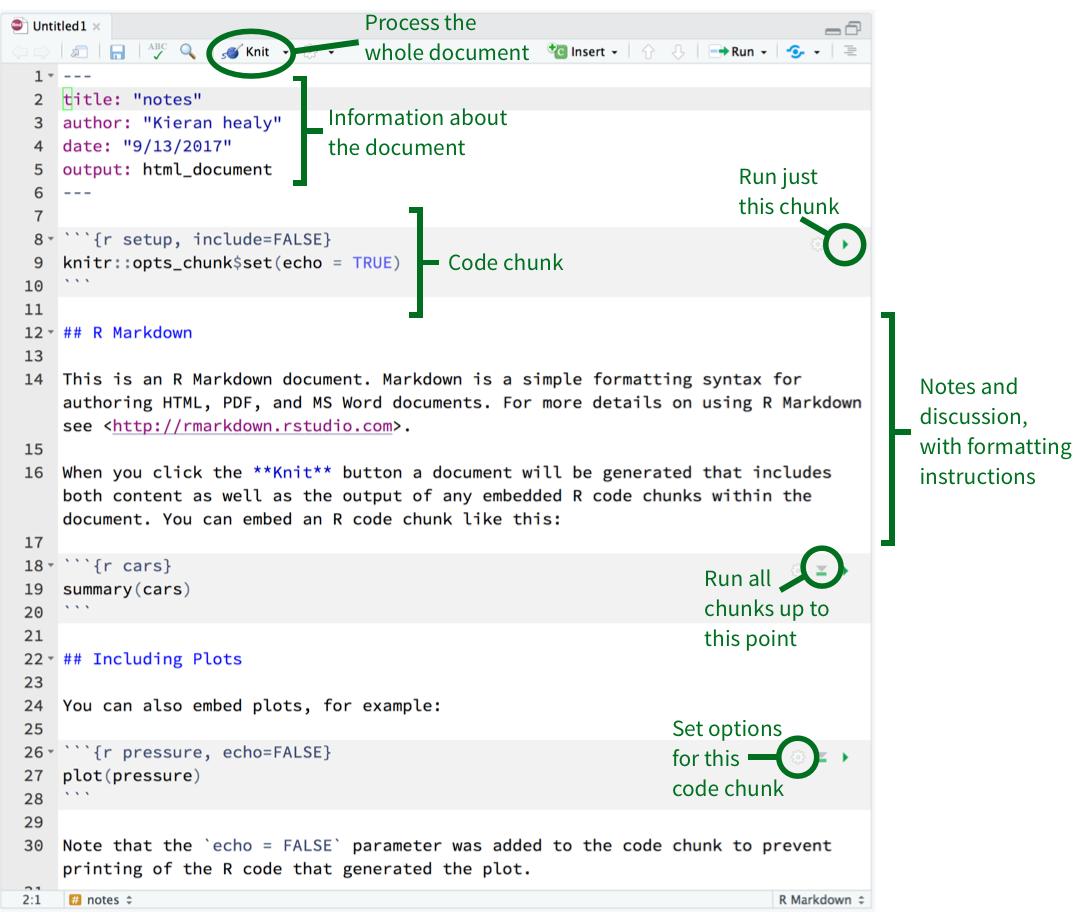
R Markdown is a magical thing. It allows you to combine R code and plain text together in the same document.
R Markdown documents end with the extension .Rmd. Let's take a look at how they work...

Your turn 2
02:00
Open the file
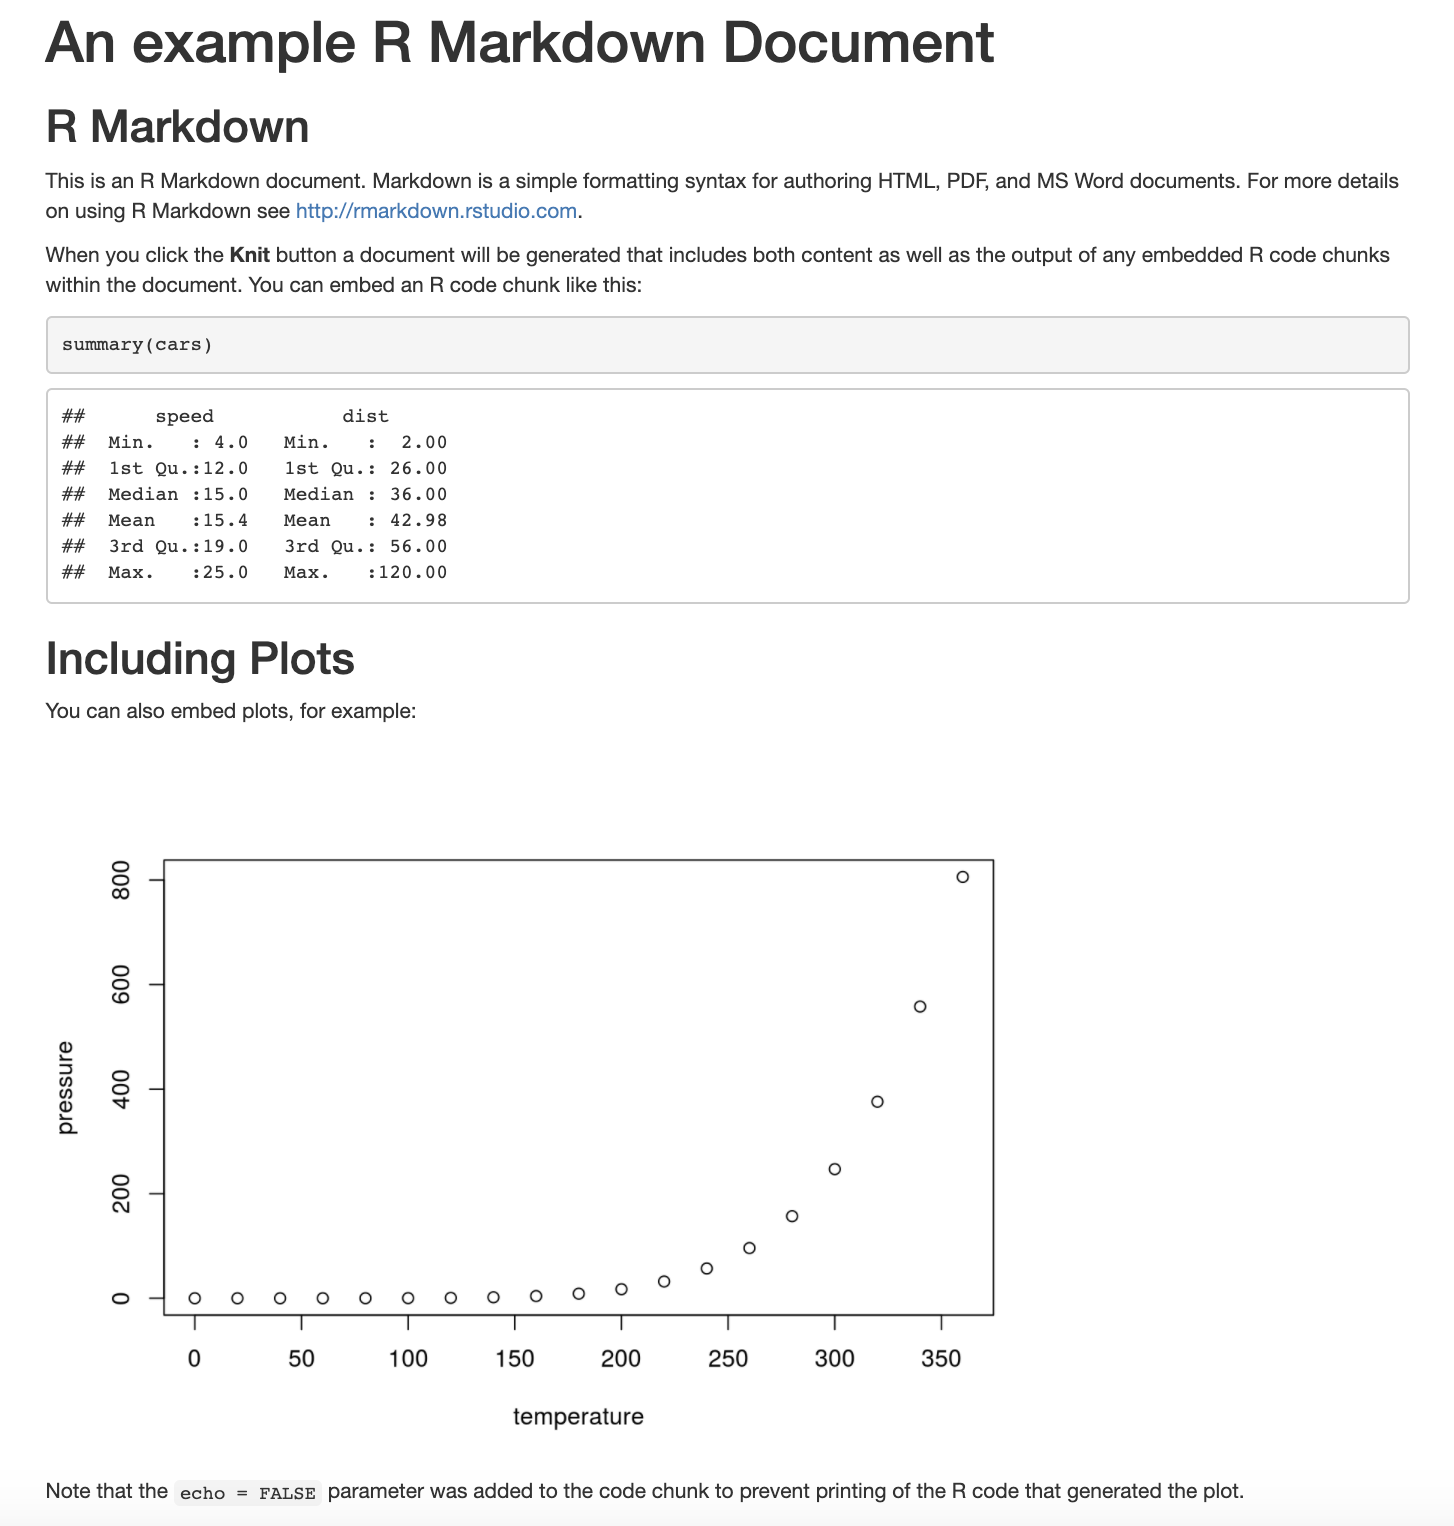
rmarkdown_example.Rmdand clickknit. Take a look at the resulting file calledrmarkdown_example.html.Go back to
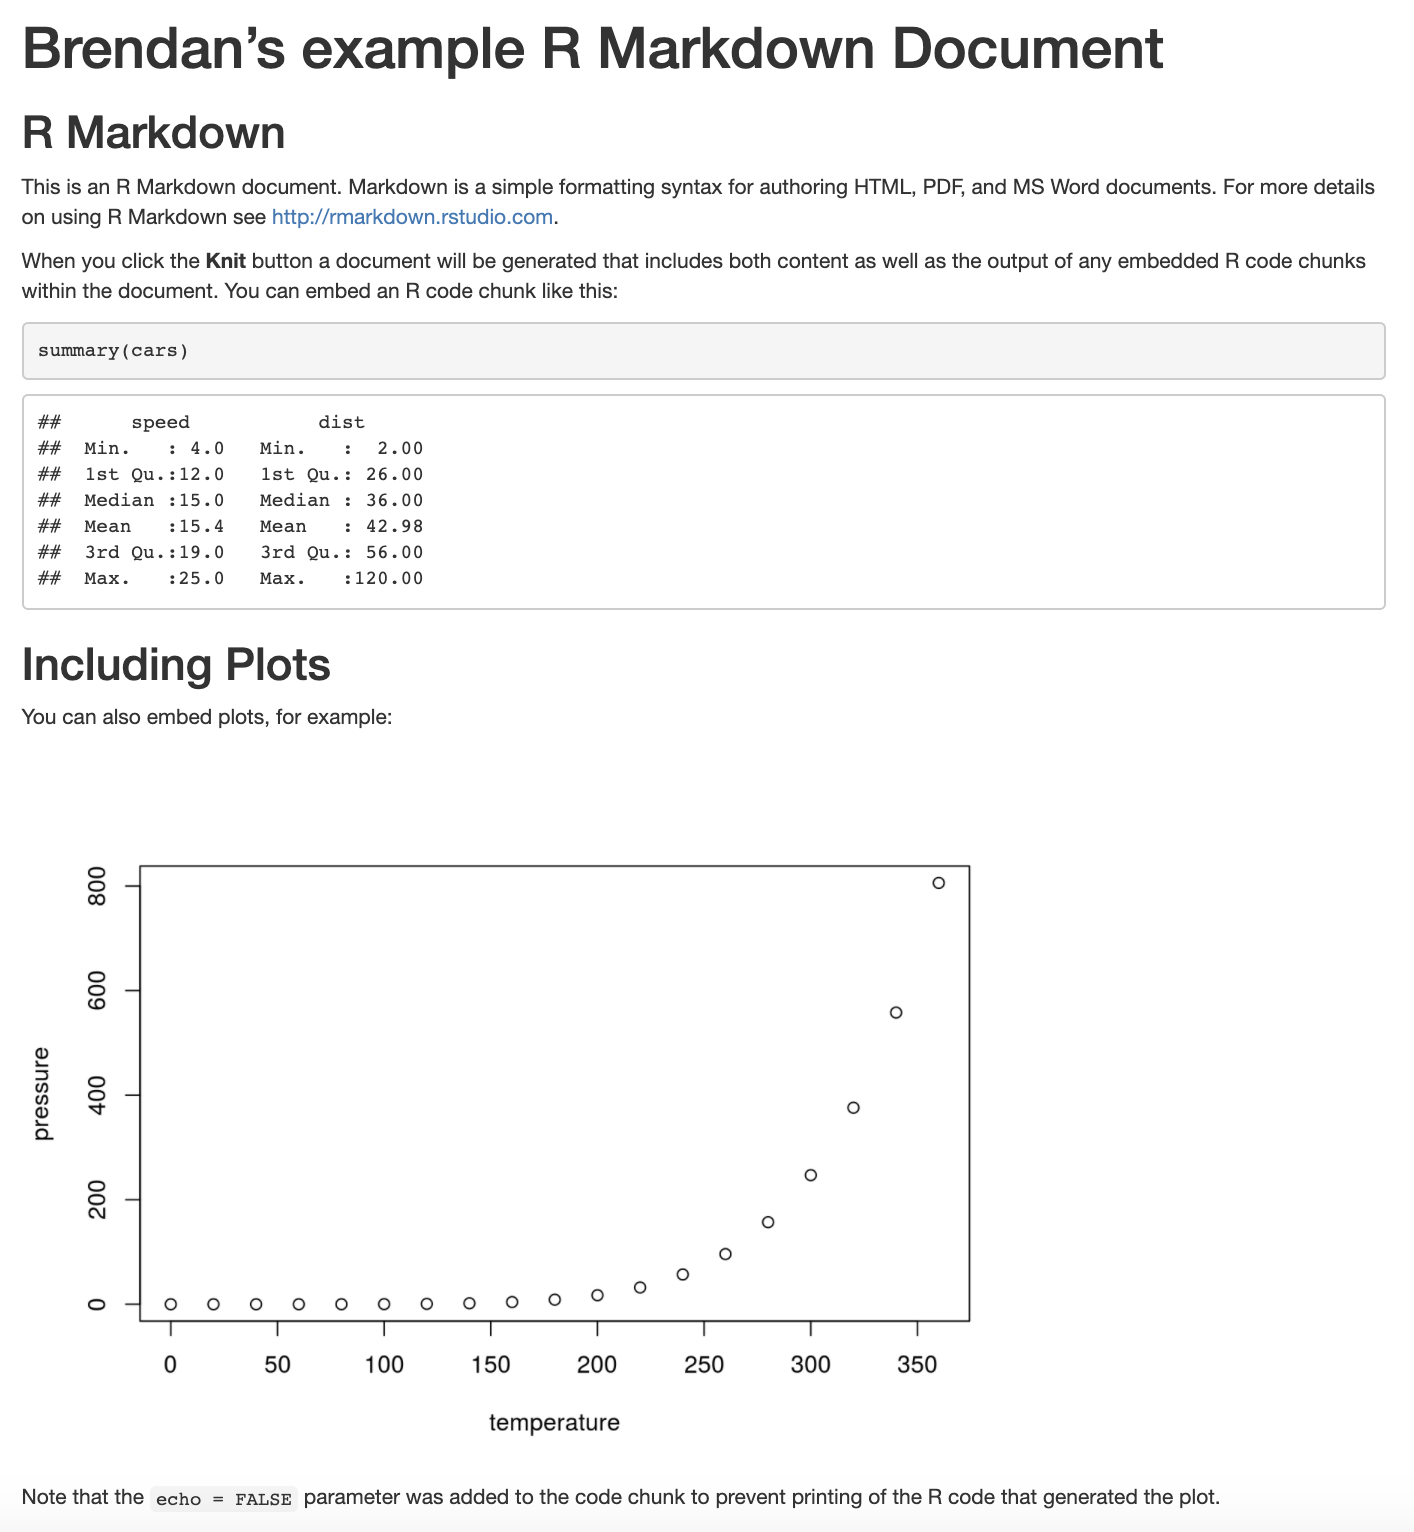
rmarkdown_example.Rmd. Change the title to"[Your name]'s example R Markdown Document"and re-knit.
Q & A
05:00
Next up...
Data Types & Structures
Break!
10:00
